

Azure Static Web Apps is a new technology to deploy static websites using serverless APIs as the backend. This post shows step-by-step how to create a static blog using Jekyll and deploy it using Azure Static Web Apps.
Prerequisites
- Install Jekyll
- An active Azure subscription
- A Github account
- Your preferred Jekyll theme
- Visual Studio Code with Azure Static Web Apps extension installed
Create your Jekyll App
For this blog I’m using the Chirpy theme so I started by cloning the project from Github locally.
There are some instruction on the theme page to guide you through the process of customizing it to your liking.
Start by customizing _config.yml with your information. Posts go into the _posts folder in Markdown format, pictures and other media goes into assets folder.
You can test your blog locally by running:
1
bundle exec jekyll s
Push your application to Github
Once the blog is to your liking, commit the changes to Github:
- Initialise the Git repository
1
git init
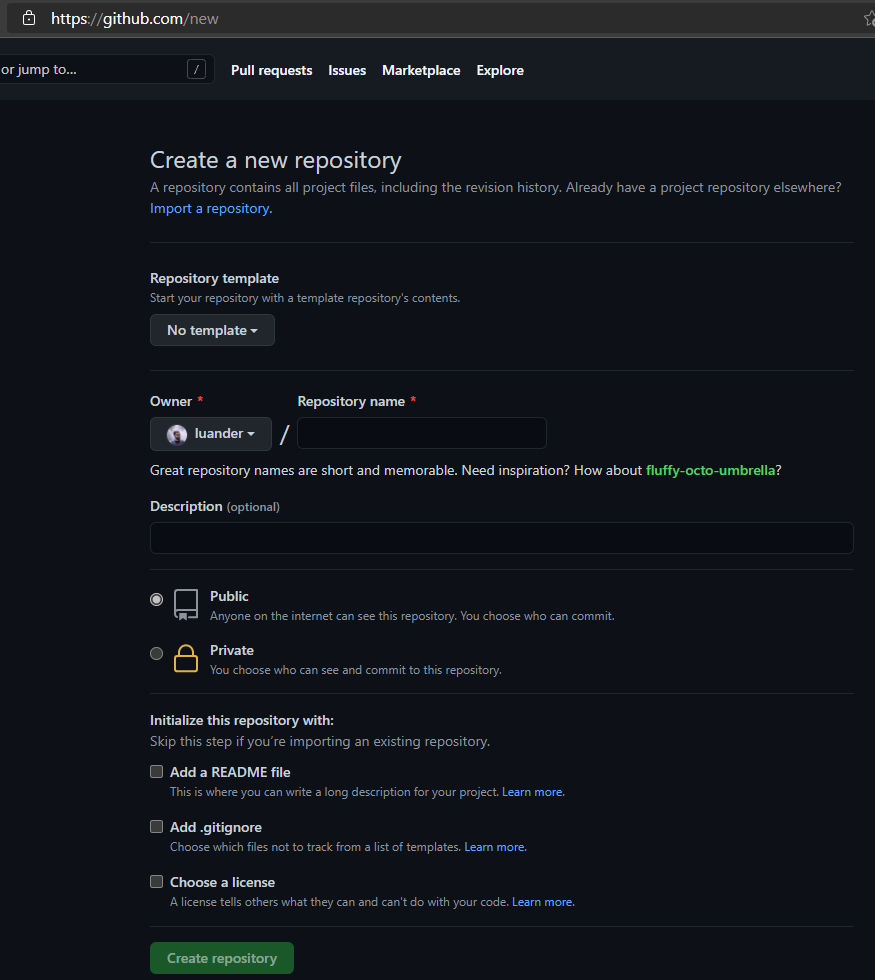
- Create a public repository in Github:

- Add the new Github repository as a remote source to your local git:
1
git remote add origin https://github.com/<YOUR_USER_NAME>/<YOUR_REPOSITORY>
- Commit your changes locally:
1
2
git add .
git commit -m "Initial commit :)"
- Push your local changes to Github:
1
git push
Create your Azure Static Web App
Since Azure Static Web Apps are still in preview, you cannot use ARM templates to deploy your Static Web Apps just yet, leaving you with either deploying it via the Azure Portal or through the VS Code extension.
I’ll describe the steps to create the Static Web App using the VS Code extension. Once you have the extension installed click on the Azure icon on the left sidebar.
- Click on the
+sign to create a new Static Web App - Choose a name for your app and press enter
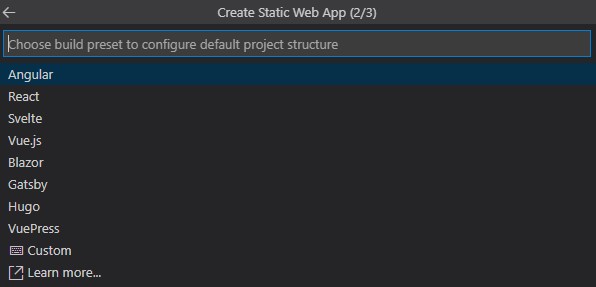
- You’ll then be presented with the choice of different build presets to select from, choose custom since we aren’t gonna use any of the options. Select Manually enter location
- In the enter location dialog write in
/_siteas that’s where Jekyll stores the compiled website - The API or Build location is not required for now, press enter until you are presented the option to select which region to deploy the Static Web App. Choose the region closer to where you are.
You’ll then be prompted to link your Azure account to your Github account. Follow the steps as instructed. At the end a file will be created in your repository
.github/folder and theyamlfile inside that folder will deploy your website to the Static Web App automatically.


 You’ll then be prompted to link your Azure account to your Github account. Follow the steps as instructed. At the end a file will be created in your repository
 Deploy your App
Because we are deploying a Jekyll to a Static Web App the first run of the action will fail, don’t worry.
Run git pull to update your local repo to the newly added changes and edit the .github/workflows/azure-pages-<WORKFLOW_NAME>.yml file to include some missing settings.
- Before the line - name: Build And Deploy add the following configuration block:
1
2
3
4
5
6
7
8
- name: Set up Ruby
  uses: ruby/setup-ruby@v1.59.1
  with:
 ruby-version: 2.6
- name: Install dependencies
  run: bundle install
- name: Jekyll build
  run: jekyll build
- This should be enough changes to make your Jekyll blog compile and be deployed to the static web app in Azure. Commit and push your changes
1
2
3
git add .
git commit -m "Your commit message"
git push
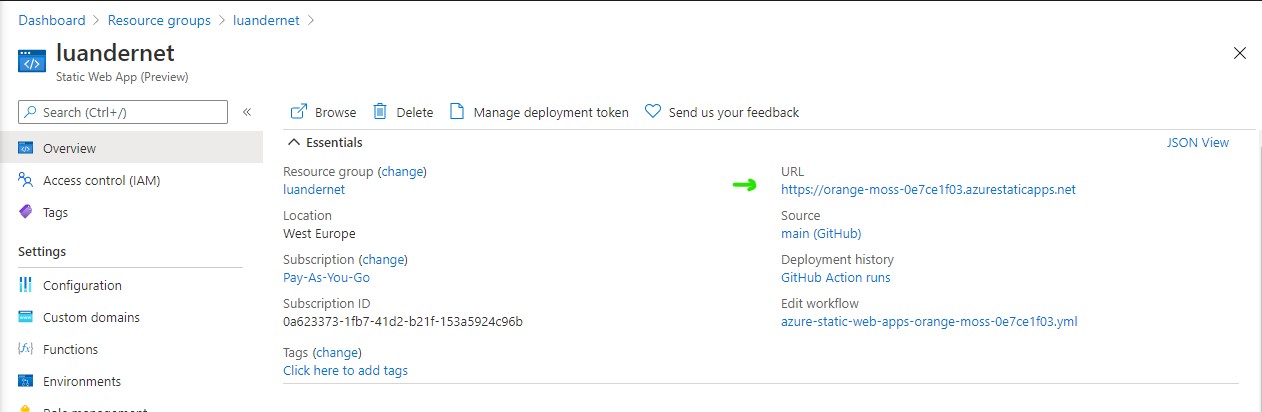
After the Github action succeeds, you’ll be able to access your newly deployed Jekyll blog by going to Azure and checking the Static Web App url:
Configuring a custom domain
Now, you don’t want to access your Jekyll blog using a complex url, you want to map it to the domain you own.
- To achieve that you need to go to Custom Domains menu in the Azure Portal and select
+Add - Enter your domain and click Next
- Configure a new CNAME DNS record pointing to your Azure Static Web App. This can be done where you bought your domain.

Configuring a root domain in an Azure Static Web App
This isn’t officially supported as of now. But there’s a way if you really need it. Find more info on this external blog post